After I was done with my part of this project, I put all my videos and photos from the shooting day, together and created this montage.
Animation and Rendering
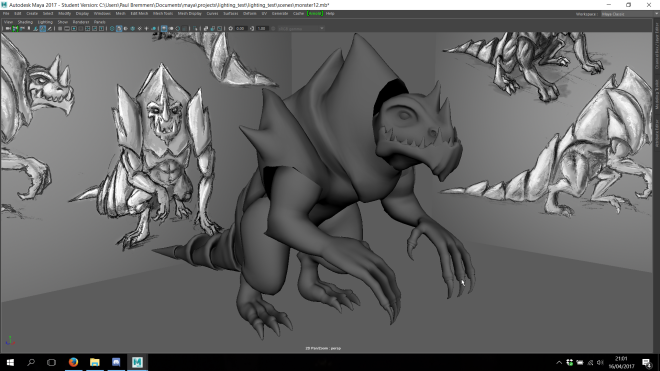
Animation
After rigging came animation. Rob and I divided the animations so we both had to work on three animations of 24 fps. We created these animations following the storyboard and montage.

The monster was easy to animate thanks to the rig. I never really liked animation before, but working with your own model and with a smooth rig was really fun. I don’t mind animating that much anymore and I’ve gotten better at it.
The most important parts of the body were controlled with FK and IK handles.
The other small things like the toes and fingers were controlled directly with the joints.
Animating was quite easy and the rig worked really well, but the jaw was a different thing. the jaw didn’t have his own joint and was fixed to the head for small movements i had to select the faces and animate it by hand. for the screaming scene Rob created the needed joints to animate it properly.

After the animations were done we were going on to Rendering and Lighting.
The lighting and Rendering went pretty well, the lighting was almost perfect from the beginning. we just used the Arnold skydome light with a picture of our forest and a 3 point lighting setup on the monster.
We had to put of the shadows on the front light and put a green image plane behind the monster to put it in our video.

We rendered the animation to a tif format and used the render sequence to render all the frames after each other. It took some time to figure all the settings out and the first few renders were way to light because we accidentally put the gamma setting up.

I’m very happy how this turned out and it was a great experience. I’ve learned allot and feel motivated create more animations and renders.
360 video editing
For the 360 video part, we used the Samsung Gear 360. In addition to our main video, we wanted to introduce the 360 video as a prologue that builds up the tensions with foreshadowing sounds.
Spatial audio
In order to simulate a realistic 3D sound, we used the H2N zoom, this device has a spacial audio recording mode that simulates the direction of the sound.
Stitching
After the video was shot, the footage needed to be converted “Stitched” to an equirectangular layout to be able to edit in premiere and after effects. This was automatically done from the Gear 360 software on my Galaxy S6.
VFX elements
As not much is happening in the video, we decided to put more atmosphere in the scene. The setting is a rocky forest, and as there are no large rocks to be found in the Netherlands we had to improvise.

I Opened the video in Photoshop as a reference, to create layers with rocks and adjust them to the lighting and color of the scene.
Furthermore, a stock footage from mist was added in After Effects and final color grading was done in Premiere pro.
On spot
On the day 30th of march we went to Buurserzand for shooting the footages.
My Job today is the camera man. I filmed all the footages we need for the editing according to the storyboard. There are several things we did that are worth mention.
- we used umbrella to create a nature shadow
- we used green screen out door
- we tested the green screen footage on spot
- we found a nice location


ALL TOGETHER
After the filming day we got all the footage done, also Paul and Rob have made the monster animation in Maya. now it’s my turn to put the monster animation with background we took and the green screen footage together.
I took out the green from the footage in Maya. putting everything together. here is the result and the main working process.

bg

paul(GS)

Paul in bg

Monster animation

all together
Animating the monster
Together with Paul, we animated the monster in Maya. We divided the several scenes. Afterwards we decided the positions of the monster and had to estimate how long each animation should be according to the recording footages we have.
We used the standard of 24 frames/sec as a measurement to set the speed.
After pitching the playblasts with our teammates, we got to the rendering.
Rendering
We used the Arnold rendering system that is integrated in Maya 2017.
To get a realistic result, we needed to keep in mind:
- Light direction
- Angle
- Texture
For this, we used an image plane of the footage as a reference. Lighting was done in a 3 point lighting setup with an additional Arnold light dome that contained a picture of the footage. This light dome creates a realistic reflection on the surface of the animated monster.
For the rendering we removed the background and placed a solid green to key out in After Effects in a later stage.


Texturing in ZBrush
Learning ZBrush
This week I got to work on the texture maps of the 3D monster. For this we decided to work in Pixologic ZBrush. This Tool is incredibly powerful in making detailed photorealistic 3D models and and allows for sculpting with the use of textured brushes and alpha layers.
As I have never worked in ZBrush before, I had to find out how the interface works and determine which workflow I should approach.
Painting textures
Paul sent me his lovely created 3D model, which I imported in ZBrush.

After getting used to the software and studying some photo references, I started painting by using a leather like material. I started by painting a dark color on the material, followed by layers of lighter color to articulate the shape of the muscles and other limbs.
I used a dotted alpha layer to simulate a realistic lizard skin.
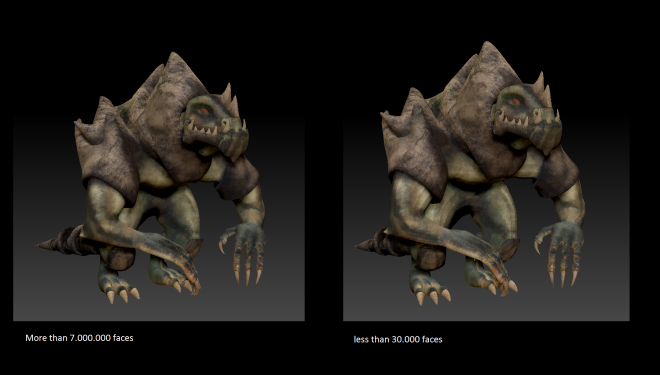
I wanted to create a sharp, detailed texture, so I found that I had to increase the polycount a lot. This required me to map the texture to a lowpoly mesh in a later stage (see Baking textures)
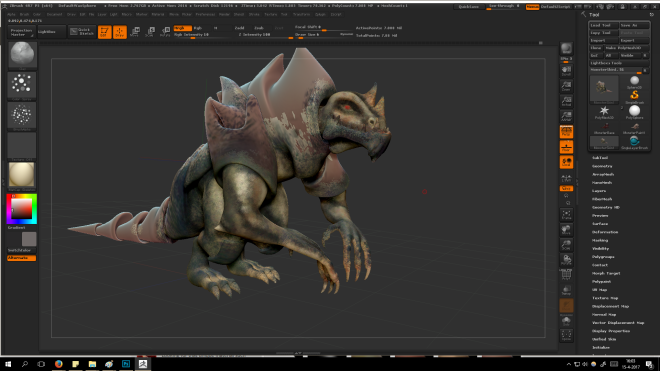
With this, the texture was finished. I’m quite pleased with the result.

Baking textures
I increased the polycount a lot to achieve better results. However, this is not what I wanted to keep because the model has to be managable in Maya for the animation later.
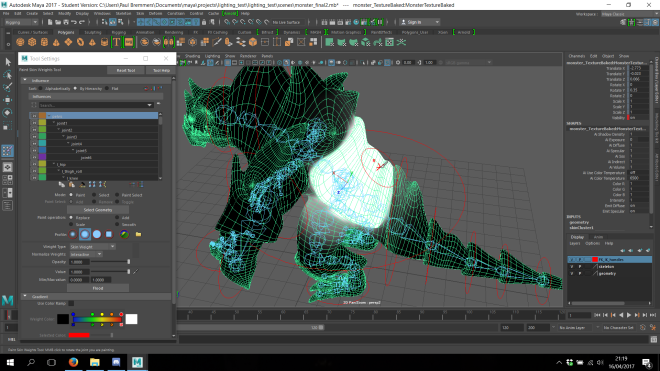
For this, I had to bake the high resolution texture into the lowpoly model that was delivered to me.
Using the UV Master tool, I made a lowpoly clone of the model, which I unwrapped and flattened, this gave me the UV map to work with.
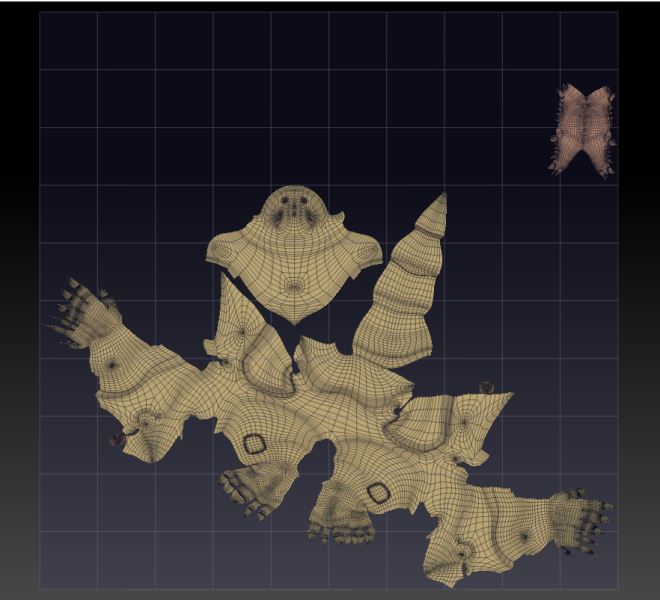
Afterwards, I copied the UV to the highpoly model to map the textures to it.
The texture was now baked onto the lowpoly mesh. With this, I created a model that looks the same as the highpoly model when smoothed out, and yet is perfectly managable in Maya.
Normal – and specular maps

With this texture, I created normal maps and specular maps in crazy bump to get an even more realistic feel to the texture. It lets the texture appear to have a lot of detail in depth, without the geometry changing.
Importing in Maya
In the meanwhile, Paul had been setting up the rig skeleton and applying the weight paints. The model is now ready to be animated.

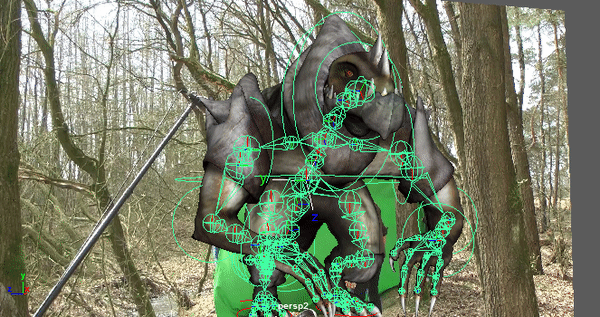
Rigging the character
Making the skeleton
For the rigging I used tutorials from youtube and a course of Lynda.com. I’ve rigged twice in my life but never with a fully constructed model.
First thing to do was creating a skeleton using the joint tool.


I quickly ran into problems at the hands. I wanted to rotate the fingers on the Y axis but the joints were pointing the wrong way. i followed multiple steps shown on forums and youtube but i could never change the rotation axis of the joints.
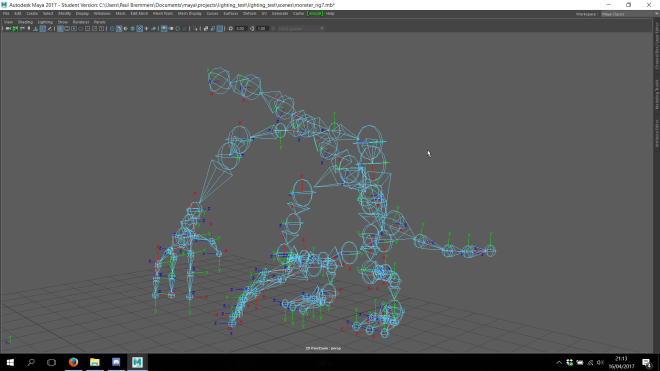
Creating the IK and FK handles
I created 2 seperate joints for the left leg and created a IK handle on one and a FK handle on the other. I followed the Lynda course to create a IK/FK switching system but i ran into the same problems ass i did with the hands. I could not change the rotation axis of the joints and the 3 joints i had created had different rotaions.
In the end i created the IK and FK handles right onto the deformation joints.


Weighing down the vertices
After creating the rig i had to weigh down vertices using the Paint Skin Weights Tool. This tool will let you anchor vertices to a selected joint.
this would let you controll how much parts would move when animating the creature.
I weighed down the backscale to the pelvis so it wouldn’t bent while animating the legs and i weighed down the head to the headjoint so everything would move with it and not stretch.

Sources
https://www.youtube.com/watch?v=Ah-Jk7d30ks&t=938s
https://www.lynda.com/Maya-tutorials/Rigging-Cartoon-Character-Maya/191956-2.html
Finished 3D model
Creating the legs
The last step of the 3D model was creating the legs, reworking the shoulders and putting everything together. i’ve started with the legs, creating them very much like i created the hands.


The feet were easy to create and I am quite pleased by how they got together. forming the leg and the hip was the hardest part, to make it look plump but not fat was quite a trick.
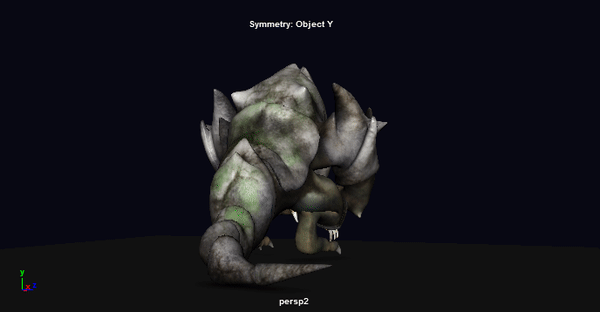
Miroring the model
After the legs i put everything in position, i remodelled the shoulders making the create more broad and intimidating and adjusting the spikes. i added some scales on the knees and finnaly i mirrored the whole model over.

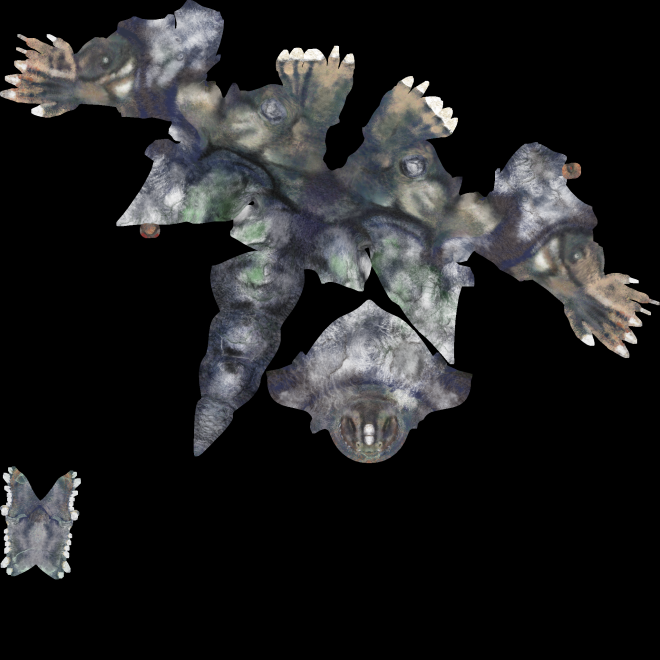
The finished model
I’m really happy with what I’ve created, it’s probably my best work till now.
I learned allot and found the joy of working with a good and original reference.
new montage out of raw shooting footage
After the shooting, we made a new Montage out of the raw footage and selected suitable sound files.
It was important for the boys to know how to animate the monster.
